Photoshop is, no doubt, one of the best editing programs out there. But, image editing and creating digital art are just the tip of the iceberg when it comes to Photoshop’s features.
This powerful software has a number of tricks that can help you improve your workflow. One of Photoshop’s best feature are Actions which allow you to automate some of the tasks you do on a regular basis and save you tons of time. In this post, we’ll explain the Action feature and give you examples on how to use them and create new actions to speed up your workflow.
[clickToTweet tweet=”Good Read | How to Use #Photoshop #Actions to Speed Up Your Workflow” quote=”Good Read | How to Use Photoshop Actions to Speed Up Your Workflow”]What Can You Do With Photoshop Actions?
Photoshop actions can be used to resize images as well as apply certain adjustments to every image or batch of images you are editing or even batch save images in a certain format. You can also set up a new document to work with, such as a layout for a business card or new graphic for your blog post.
As a general rule of thumb, any technique that consists of multiple steps or global adjustments are the editing processes that should be turned into actions.
Getting Familiar With Actions
Photoshop Actions come in handy when you have to apply several modifications or adjustments over and over to a lot of files. Let’s start with the basics of understanding the Action tool and menu bar.
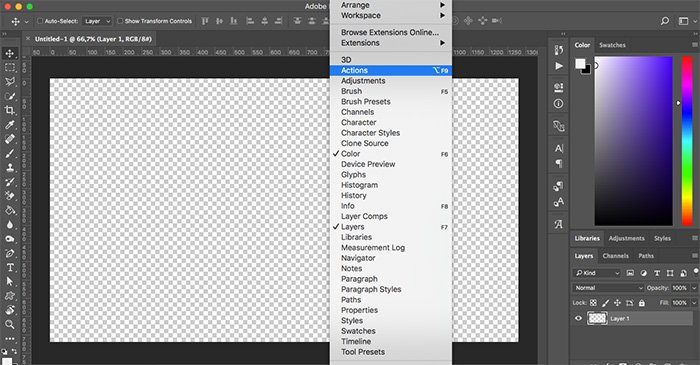
Start by making sure the action tool is visible by going to Window menu and selecting Actions from the drop down menu. You can also activate the tool by using CTRL-F9 or CMD-F9 shortcut on PC and Mac respectively.
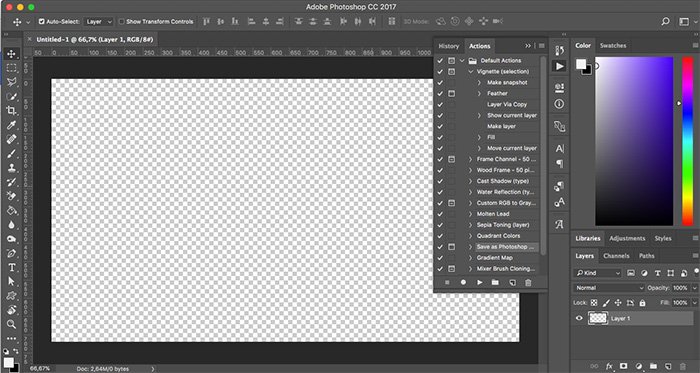
With the tool visible, click on the Play icon to reveal the options available for Photoshop Actions tool.
The bottom of the window has six buttons which allow you to create new actions and action sets, play button to execute an action, record button to record all the steps for a new action and the stop button which will stop recording the action.
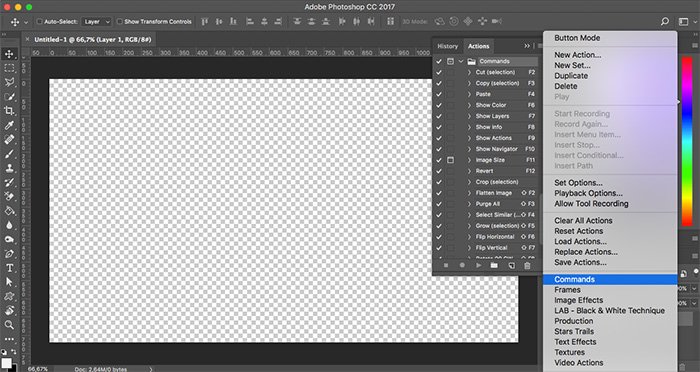
You can also delete actions using the trash icon. As you can see, Photoshop already has some actions available and loads the default set at first. You can reveal additional action sets by clicking the hamburger menu and selecting an action set from the menu.
Clicking on the drop-down arrow next an individual action will reveal all the steps that are recorded and will execute when you play it.
How to Create Your Own Photoshop Action
Now that you know what options are available, let’s create two simple actions. The first one will allow us to apply the contrast to our image and resize it and the second action will allow us to save the image as a JPEG.
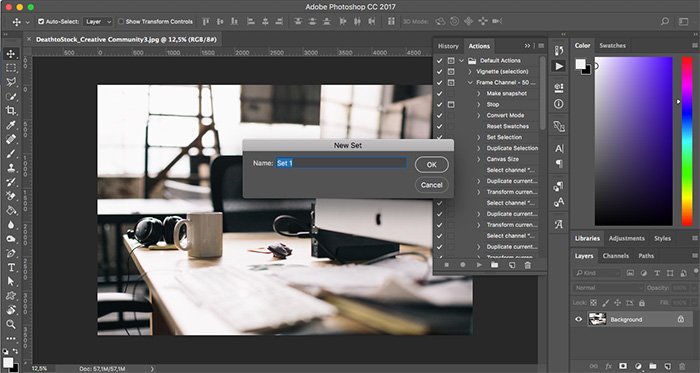
Begin by opening a photograph you’d like to use to set up your action. In Photoshop, click on the New set button and name your action set however you’d like.
Within that folder, click the New Action button and name it. As soon as you press the Record button, Photoshop will start recording the steps.
With the action recording, go to the Adjustments > Brightness/Contrast option and set the contrast to +65 and hit OK.
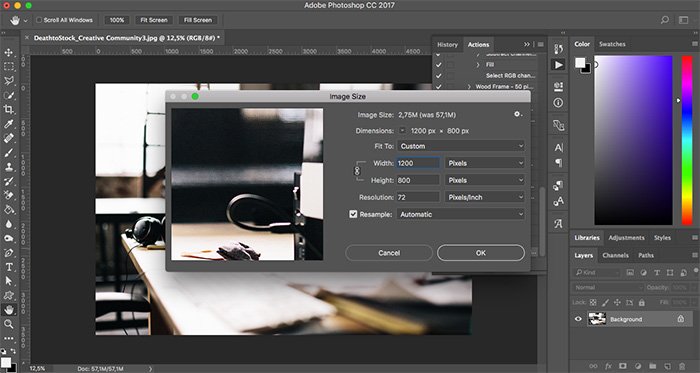
Then, go to Image Size and enter new dimensions for the image and click OK. You can then end the recording by hitting the stop button.
Now, let’s create the second action which saves the image as a JPEG file. Start by selecting the set you just created and hitting the New Action button. Name it Save As JPEG and click the Record Button.
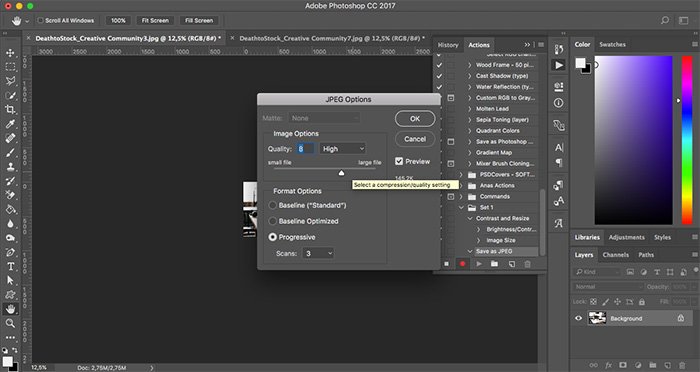
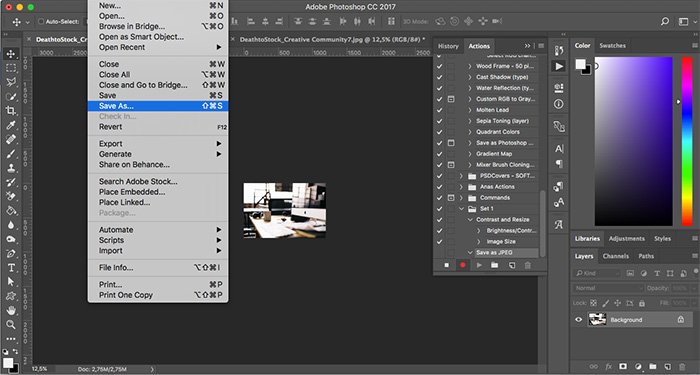
Go to File menu and select the ‘Save As’ option. Name the file as you like, change the file type to JPEG and modify the quality settings as per your preference. Choose the save location and then stop recording the action.
Speed Up Your Workflow With Photoshop Actions
Photoshop actions can be quite powerful and save you lots of time when you’re working with a large number of images. Above, we’ve shown you two practical examples of creating your own actions that you can use in your own workflow. Use them as a starting point and don’t forget to create new actions that will suit your editing style.


