Photos are a great way to preserve our memories. But sometimes, no matter how skilled a photographer you are, the perfect moment can be ruined by an unaware passerby or a leaf blown by the wind straight into the camera. Other times, we realize that there is no way to get a great shot without capturing the unwanted object as well.
Thankfully, digital photography makes it incredibly easy to remove those unwanted objects. In today’s tutorial, we’ll cover 4 different ways to remove unwanted objects in Photoshop.
4 Photoshop Tools For Removing Unwanted Objects In Your Photos
When it comes to removing unwanted objects from your photos, Photoshop is still the best tool around.
1. Spot Healing Brush Tool
The spot healing brush tool is a great tool for removing smaller objects that don’t belong in your photo. All you have to do is paint over the element or a blemish that you want to remove. The tools will sample the surrounding colors and do its magic to ensure the object is gone.
In the example below, we used the spot healing brush to remove the rock in the middle of the photo.
Before Image
After Image
2. Patch Tool
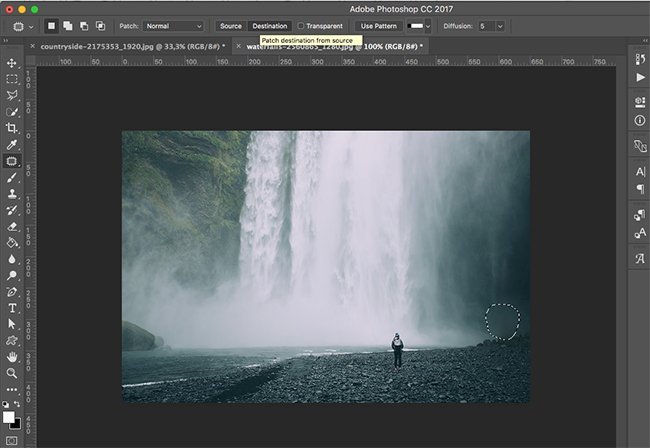
If you want a more precise way and more control over the object you’re trying to remove, try the Patch tool. First, create a new empty layer. Choose the Patch tool and then make sure that the options menu has Content-Aware selected as well the checkbox to Sample All Layers checked.
Create a selection around the object you want to remove. If you need to make the selection larger, go to Select > Modify > Expand. Now that your object is selected, click inside the selection and drag it to the area that you want to use a patch. Release the selection and the patch tool will do its magic.
A great thing about the Patch tool is that you can also select an area of an image that you like and drag it over to the unwanted object. To use the Patch tool this way, you’ll have to switch to Destination in the options bar.
3. Clone Stamp Tool
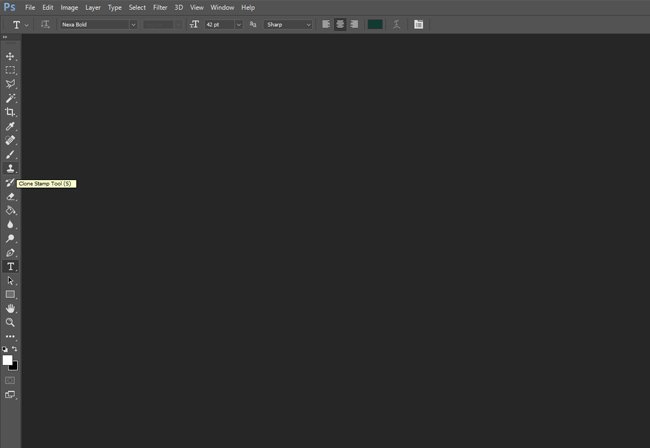
The Clone Stamp tool is slightly more trickier to use, however, it does allow you to perform some really neat manipulations in your photos. To use it for object removal, you’ll need to define a source area first. To do this, hold ALT and click on an area you would like to copy, then paint over the unwanted blemishes or objects.
4. Content Aware Fill
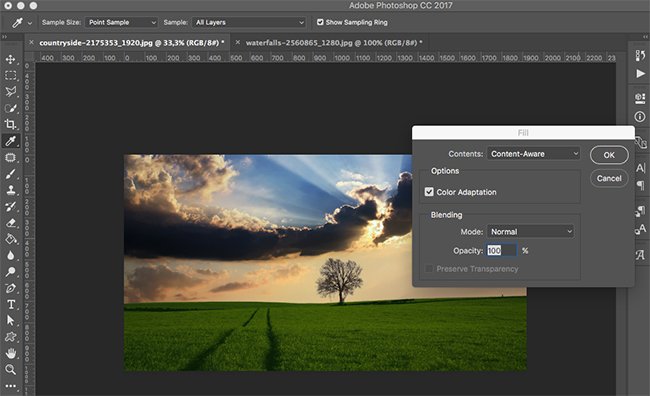
The last tool on the list is the Fill command’s Content Aware option. It works rather well to remove large objects that have plenty of background pixels around them.
First, select the unwanted object with any of the selection tools. Go to Edit > Fill and choose Content Aware. Click OK and Photoshop will sample the surrounding pixels and blend them together to remove the unwanted object like it was never there. If the fix doesn’t look right, you can repeat the steps to fill the selection again because the pixel selection is random and changes every time you use it.
[clickToTweet tweet=”4 Ways to Remove & Fix Your #Photographs Unwanted Objects In #Photoshop ” quote=”4 Ways to Remove & Fix Your Photographs Unwanted Objects In Photoshop “]Final Thoughts
Unwanted objects can easily be removed from photos when you know how. Use the tools above to remove them from your photos and make sure your memories remain beautiful.


